Most homeowners don’t have one project. They have a list: a roof getting up there in years, a soft spot in the siding, windows that fog every winter, and someone in the house sending you kitchen photos. You can’t do it all at once, and you shouldn’t have to.
Planning a home project in phases spreads the work and the cost over time. The secret isn’t how much you do each year. It’s the order. Get it right, and every phase protects the one after it. Get it wrong, and you pay to redo work you just finished.
Quick Answer: Planning a home project in phases starts at the top. Repair or replace the roof first, because it protects everything below it and its flashing ties into the walls. Next, handle windows and siding together, then gutters, paint and trim, decks, landscaping, and interior upgrades. Each phase protects the work that comes after it.
Why Planning a Home Project in Phases Starts With the Roof
Every exterior project has the same job underneath it: keeping water out. The U.S. Department of Energy calls controlling rain one of the most important factors in a durable home, with a simple principle: let water drain down, out, and away.
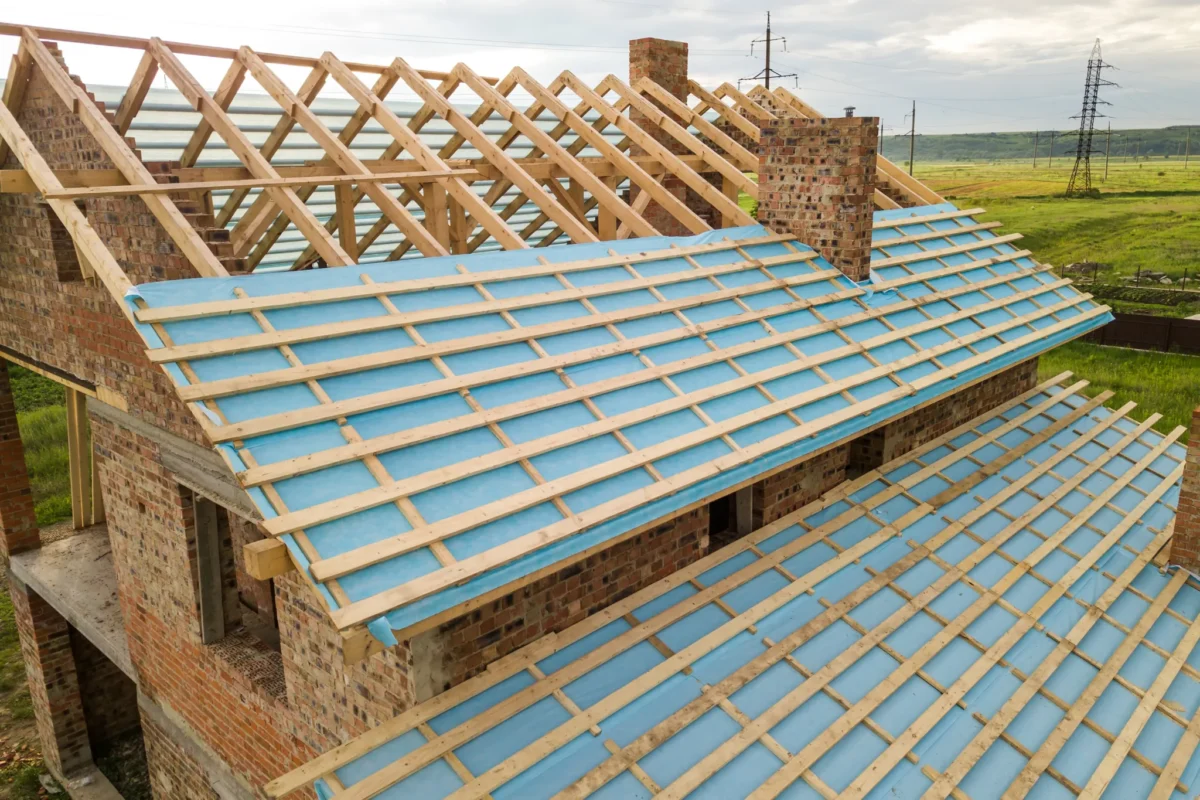
The roof is where that starts. It protects everything below it, its flashing and drip edge tie into the siding and gutters, and tear-off sends debris down the sides of the house. All three are reasons to do it before anything else. In Western Washington, the stakes are higher: Tacoma averages 35 to 50 inches of rain a year and roughly 200 cloudy days, so roofs across the South Sound work hard for months at a time.
The rule of thumb: work top down, then outside in. Seal the shell before you finish the inside.
What Order Should You Do Home Renovations In?
Phase
Project
Why It Goes Here
1
Roof, flashing, drip edge, attic ventilation
Protects everything below; flashing ties into walls
2
Windows and siding, together
Flashing and siding layers must overlap correctly
3
Gutters and drainage
Hang on finished roof edges and fascia
4
Exterior paint and trim
Finishes go on after the messy work
5
Decks and patios
Kept clear of ladders and debris
6
Landscaping
Last outside, so crews don’t trample it
7
Interior projects
Safe to finish once the shell is watertight
Phase 1 is also the time for roof upgrades that are hard to add later, like ventilation corrections and new flashing, since the deck is already exposed.
Should You Replace the Roof Before Anything Else?
In most cases, yes. Using National Roofing Contractors Association figures, the USDA Forest Service puts typical asphalt shingle lifespan at 15 to 30 years. If yours is in the back half of that range, putting new siding or windows under it is a gamble.
Two exceptions. First, emergencies come first: an active leak, rot, or an electrical or plumbing problem. If water is coming in now, emergency roof repair tops the list. Second, if an inspection shows your roof has years left, start with what’s actually failing. A targeted roof repair may be all it needs for now. Just keep the roof in your long-term plan.
Planning solar? EnergySage advises replacing an asphalt roof older than about 10 years first, since panels typically last 25 to 30 years and removing them later adds cost.
Should You Replace the Roof or Siding First?
Roof first. Roof-to-wall flashing is designed to lap over the siding below, and tear-off debris can dent or scratch new siding. The exception is siding that’s actively rotting or letting water in. Fix that area first, then return to the plan.
Should You Replace Windows or Siding First?
If you’re doing both, do them together, with windows first. Flashing and the weather barrier behind your siding have to overlap like shingles so water drains outward, an approach Fine Homebuilding lays out step by step. Planning siding and windows as one phase lets the crew get those layers right in a single pass. If you can only afford one, replace whichever is failing first.
What Should You Fix First When Renovating a House?
Fix Now
Plan Next
Can Wait
Active roof leaks
An aging roof
Paint color changes
Rotting siding or framing
Drafty or fogged windows
Decks and patios
Electrical or plumbing hazards
Overflowing gutters
Landscaping
Structural concerns
Attic ventilation problems
Interior finishes
The first column is safety and active damage. The second is your home’s shell. The third is the fun stuff, and it’ll still be there once the house is protected.
How to Build a Phased Plan Your Budget Can Handle
1. Start With an Inspection
A professional roof inspection tells you how much life your roof has left and whether there’s hidden damage at the flashing or decking. That answer decides whether the roof is Phase 1 this year or three years out.
In a wet climate, maintenance decides where you land. Keeping roofs and gutters clean is one of the simplest ways to stretch them.
3. Budget Each Phase on Its Own
Price each phase separately and leave room for surprises; opening a roof or wall can reveal hidden damage. If a phase runs bigger than expected, roof financing options can keep the project in the right order.
A Phased Plan in Practice: A Hypothetical Example
Here’s a hypothetical example of how a homeowner in Olympia might phase their list.
Year 1: The roof. An inspection shows a 22-year-old roof with worn chimney flashing. The homeowner replaces the roof, corrects ventilation, and replaces flashing and drip edge while the deck is open.
Year 2: Windows and siding. With the roof protecting the walls, the windows and siding are replaced together so the layers overlap correctly.
Year 3: Gutters, paint, and trim. New gutters go up on finished roof edges, followed by fresh trim paint.
Year 4 and beyond: The deck, the landscaping, and finally the kitchen, inside a house that’s sealed tight.
Build It From the Top Down, One Phase at a Time
A long list of house projects can feel like a weight. A phased plan turns it into something you can work through, one year and one budget at a time. Start at the top, protect the shell, and save the finishing touches for last. Each phase you finish makes the next one safer, simpler, and more worth the money.
About The Roof Doctor
The Roof Doctor is a family-owned and operated roofing company with more than 60 years of experience serving homeowners and businesses throughout Tacoma, Olympia, and the Pacific Northwest. Licensed, bonded, and insured, available 24/7, with most jobs completed in one to two days. Whether you’re starting your plan with a roof inspection or ready to tackle Phase 1, they’ll help you figure out what needs to happen first and what can wait. Call us anytime—we’re available 24/7 and happy to help.
It usually starts with a sound: a slow tick on the hardwood, late on a night when the wind has been pushing rain against the house for hours. You look up, and there it is, a brown ring spreading across the ceiling.
Here’s the good news. Knowing how to handle a roof leak in winter comes down to a few calm, practical moves, and nearly all of them happen inside your house, where you’re safe and dry. You don’t need to climb anything tonight. You need a bucket, a flashlight, your phone, and a clear head.
Quick Answer: To handle a roof leak in winter, start inside: cut power to any wet fixture, catch the water, drain a bulging ceiling at its lowest point, and photograph everything. Stay off a wet or icy roof. A temporary fix is the right call when cold, wet weather won’t allow a lasting repair. It stops the water until conditions do.
How to Handle a Roof Leak in Winter: Your First 30 Minutes
The order matters: people first, then property, then evidence.
Step 1: Make the Area Safe
If water is near a light fixture, ceiling fan, outlet, or your electrical panel, shut off that circuit at the breaker. Don’t flip the switch to “test” it. Move kids and pets out of the room.
Step 2: Catch the Water
Move furniture, electronics, and anything sentimental out of the way. Set down buckets with an old towel in the bottom to stop the splashing, and lay a drop cloth or tarp over the floor.
Step 3: Relieve a Bulging Ceiling
A sagging bubble in the drywall is holding water and will eventually let go all at once. Stand to the side, set a bucket below, and poke a small hole at the lowest point with a screwdriver. A small hole is an easy patch. A collapsed ceiling is not.
Step 4: Document Everything
Photograph and video the ceiling, the water, and anything damaged, with timestamps. Keep receipts for tarps, buckets, fans, or a dehumidifier.
Step 5: Call for Help, and Stay Off the Roof
A wet, dark, windy roof is dangerous, and winter adds frost and slick moss. Cold shingles are brittle, too: Malarkey’s cold-weather bulletin cautions that walking on them can crack them or break their sealant bonds. Instead, call a team that offers emergency roof repair and can assess the damage safely.
Should You Turn Off the Power If Your Ceiling Is Leaking?
If water is anywhere near anything electrical, yes. Shut off the affected circuit at the breaker. If the panel itself is wet, or you’d have to stand in water to reach it, don’t touch it; call your utility or a licensed electrician. Afterward, the Electrical Safety Foundation International (ESFI) recommends having water-damaged electrical equipment evaluated by a qualified electrician before it’s used again.
How to Stop a Roof Leak From the Inside
You can’t fix a roof from the inside, but you can slow the damage. If your attic is safe to reach, follow the wet streak uphill with a flashlight, since water usually runs along rafters before it drips. Note what sits above the wettest spot, like a chimney, vent pipe, or skylight. That detail helps your roofer find the source of the leak faster.
Step only on the joists. Set a board across two of them and place a bucket under the drip. Roofing tape or sealant on a visible gap can buy a few days, but it isn’t a repair. Leave wet insulation in place and photograph it; the EPA’s water-damage guidelines list wet cellulose insulation as a material to replace rather than dry.
Why Winter Roof Leaks in Western Washington Are Different
Most winter roofing advice is written for snow country. Here, the problem is rain. Tacoma averages 35 to 50 inches a year and roughly 200 cloudy days, so roofs across the South Sound stay damp for weeks. Atmospheric rivers add to it; NASA notes they occur regularly in winter and can account for up to half of the western U.S.’s rain and snow. When one arrives with wind, water gets driven sideways into places a roof normally keeps dry.
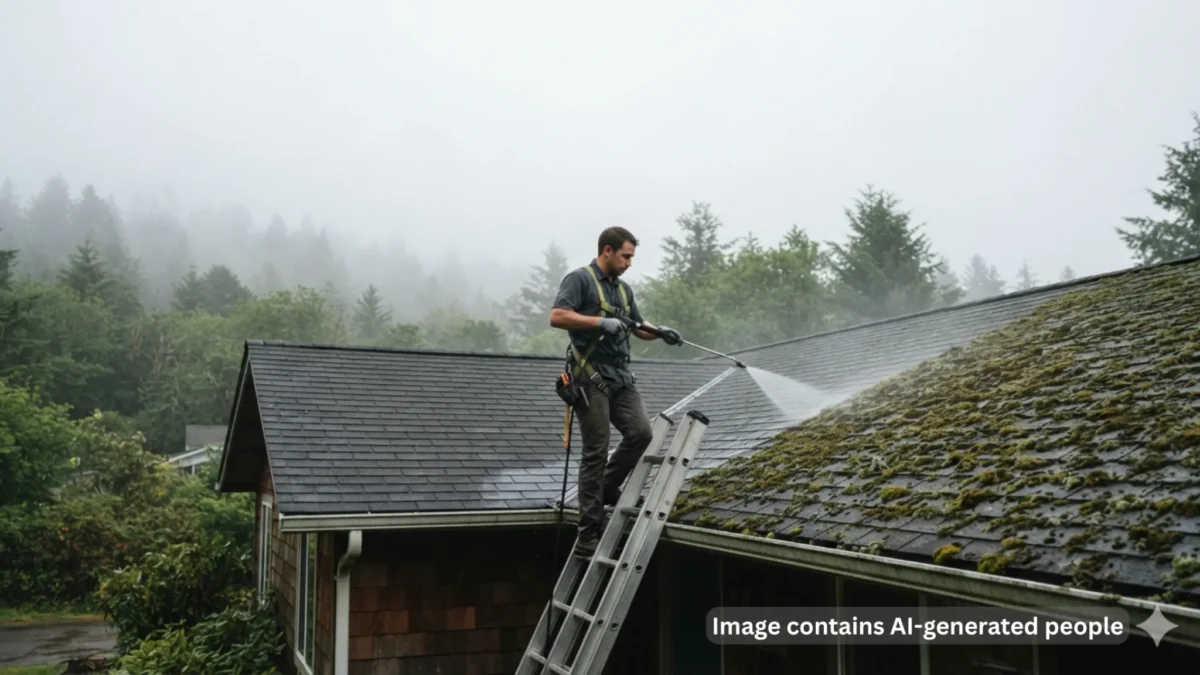
From Hoquiam and Shelton to Olympia and Longview, most winter leaks trace back to wind-lifted shingles, cracked pipe boots, failed flashing, or gutters packed with fir needles and leaves. Regular roof and gutter cleaning heads off more winter “roof” leaks than most homeowners expect.
When a Temporary Fix Is the Right Call
A temporary fix can feel like half a job. In winter, it’s often the smartest first step. Shingles bond with a factory sealant strip that needs heat: GAF explains that it needs warmth, sun, and temperatures above 40°F to seal, and Owens Corning notes shingles installed at or below 40°F may not seal until it warms up. Roofers can hand-seal shingles in the cold, but on a dark, pouring night, the right job is stopping the water now and doing the lasting work when it will hold.
Temporary or Permanent? A Quick Decision Guide
Your Situation
Temporary Fix Now?
When to Do the Permanent Repair
Active storm, a few shingles missing
Yes
First dry, mild stretch
Cracked pipe boot, steady drip
Yes
Within days to a couple of weeks
Flashing leak at chimney or wall
Yes
Soon; these tend to worsen each storm
Sagging deck or ceiling
Stabilize only
As soon as safely possible
Recurring leaks on an older roof
Short-term only
Plan a roof replacement conversation
How to Stop a Roof Leak Temporarily
Inside, the job is yours: contain the water, redirect attic drips, and document. Outside belongs to a professional. A properly placed tarp extends well past the damage, channels water downhill, and stays tight so wind can’t get under it. Small openings can be patched with weather-resistant materials. All of it happens on a wet, sloped surface, which is why it’s work for a crew with roof repair experience. Think of a temporary fix as a bridge, with a plan for the permanent repair on the other side.
What Happens If a Winter Leak Waits
First few hours: Water spreads across framing and the top of the ceiling before it shows.
24 to 48 hours:EPA guidance centers on drying water-damaged materials within this window to help prevent mold. Fans and a dehumidifier help.
Weeks to months: Wood that stays wet can rot. Washington’s Office of the Insurance Commissioner notes most standard homeowner policies don’t cover mold or rot, which insurers treat as maintenance. Report damage promptly, keep receipts, and check your own policy.
From Temporary to Permanent
Once the storm passes, an inspection confirms where the water got in and whether underlayment, decking, or flashing needs work. Bring a few questions: Where exactly is the water entering? Was today’s work temporary or permanent? Will new shingles be hand-sealed in the cold? If it points toward a new roof, know that roof financing options exist so a December surprise doesn’t derail your budget.
A Wet Night Doesn’t Have to Become a Bad Winter
The homeowners who come through a winter leak in the best shape aren’t the ones who did something heroic on the roof at midnight. They kept the room safe, caught the water, took good photos, and made one good phone call. You can handle every item on that list. The temporary fix buys you time, and the permanent repair buys you peace of mind.
About The Roof Doctor
The Roof Doctor is a family-owned and operated roofing company with more than 60 years of experience serving homeowners and businesses throughout Tacoma, Olympia, and the Pacific Northwest. Licensed, bonded, and insured, available 24/7, with most jobs completed in one to two days. Whether you’re watching a drip at midnight or planning the permanent repair once the weather breaks, they’ll help you understand what’s happening and what makes sense next. Call us anytime—we’re available 24/7 and happy to help.
If you’ve started collecting solar quotes for your home in Tacoma, Olympia, or anywhere else in the South Sound, you’ve probably noticed that every proposal focuses on the same things: panel count, system size, projected savings. What almost none of them spend much time on is the thing the panels are actually going to sit on for the next 25-plus years—your roof. Adding solar to your roof is a significant investment, and the condition of the roof underneath it determines whether that investment pays off cleanly or turns into an expensive, avoidable mess a decade from now.
If you live anywhere near Hoquiam, Aberdeen, or the rest of the Grays Harbor coastline, you’ve probably watched it happen in real time. A roof that looked clean last spring has a green, spongy carpet creeping across the north slope by fall. A neighbor two streets over, further from the tree line, is still moss-free. If you’ve noticed moss growing fast on your roof lately, it’s not your imagination, and it’s not bad luck—coastal Washington roofs grow moss faster than almost anywhere else in the state, for reasons that come down to rainfall, fog, and the trees that surround most coastal homes.
A complete, correctly sized gutter installation is almost always a fraction of the cost of repairing the damage insufficient gutters allow to accumulate.
When you invest in a new roof, you’re not just buying shingles—you’re buying decades of protection. The warranty behind that roof is what determines whether that protection is real or mostly theoretical.
There’s a moment near the end of every roof replacement conversation where the estimate is on the table, the number is bigger than expected, and the instinct is to start looking for places to cut. A few hundred dollars here. A line item there. Anything to bring it closer to what you had in your head.
You’ve probably noticed it—those dark streaks running down the shingles, the patchy discoloration that wasn’t there last year, the faint green tinge creeping along the north-facing slope. Maybe you’ve been telling yourself it’s just dirt or tree sap.
In the Pacific Northwest, tree coverage damages roofs through four mechanisms: sustained shade that prevents drying, continuous debris accumulation, moss and algae colonization, and direct physical contact from overhanging branches. Together, these forces can shave a decade or more off a roof’s lifespan—quietly, without warning, and almost entirely out of sight.
If you live in the Pacific Northwest, there’s a good chance your home sits under a canopy. Tall Douglas firs, western red cedars, big-leaf maples, and alders are part of what makes this region so beautiful—and they’re also some of the most underappreciated threats to your roof’s lifespan. Not because trees are inherently bad neighbors, but because in this climate, the combination of heavy shade, persistent rainfall, and constant organic debris creates conditions that quietly work against your roofing system year after year.
The damage rarely announces itself. It builds slowly, underneath moss mats and debris piles, behind the fascia, in valleys and gutters you can’t see from the ground. By the time most homeowners notice something is wrong, the tree overhead has already been doing its work for years.
This guide is for every PNW homeowner who loves their trees and wants to keep their roof, too. Understanding exactly how trees damage a roof in this climate—and what you can do about it—is the first step toward getting ahead of a problem that’s far easier to prevent than repair.
Why the Pacific Northwest Makes Tree-Related Roof Damage Uniquely Severe
Before getting into the specific damage mechanisms, it helps to understand why this is a bigger problem here than almost anywhere else in the country. The answer starts with rain.
Why Tree Shade Causes So Much Roof Damage in the PNW
In a climate like Phoenix or Dallas, a shaded roof is a blessing. Heat is the enemy, and trees provide relief. In Western Washington, the calculus is entirely different.
The Pacific Northwest receives between 35 and 60 inches of rainfall annually, depending on location, with areas around Olympia and Tacoma averaging well over 50 inches. According to NOAA climate data, Western Washington ranks among the most consistently overcast regions in the contiguous United States, with hundreds of cloudy days each year. Roof surfaces under tree canopy dry out dramatically slower than exposed ones. On a sunny day in August, an exposed roof might dry within an hour of a morning rain. A roof shaded by a mature Douglas fir may stay damp for most of the day—and in fall and winter, it may stay damp for days at a stretch.
That sustained moisture is the root of almost every tree-related roofing problem in this region. Moss, algae, lichen, rot, and debris-related damage all require one thing to thrive: a roof that stays wet. Tree shade doesn’t just slow drying time—it can effectively eliminate the dry windows that would otherwise interrupt the biological growth cycle on your shingles.
The Compounding Effect of Organic Debris
It isn’t just shade. Trees deposit organic material on your roof continuously: needles, leaves, seed pods, twigs, bark, and in the case of cottonwoods and alders, fine organic dust that settles into shingle granules. Each layer of debris adds to the moisture-retention problem, creating a damp mat that keeps shingles wet even after the shade lifts. And in the PNW, where trees lose material nearly year-round, there’s rarely a long window where a neglected roof dries out and resets.
Pine Needles vs. Leaves: Not the Same Problem
Most homeowners lump all tree debris together when thinking about roof damage. But pine needles and broadleaf debris behave differently on a roof, and understanding the difference helps you know what to prioritize.
What Pine Needles Do to a Roof
Pine needles—and the needles of firs, cedars, and hemlocks so common in the South Sound and throughout Western Washington—create a specific and persistent problem. Unlike leaves, which tend to blow off or decompose relatively quickly, needles are dense, waxy, and slow to break down. They interlock when they accumulate, forming a thick, stable mat that:
Holds moisture against shingle surfaces for extended periods
Clogs gutters more severely than leaves, often creating solid blockages
Decomposes into an acidic organic matter that gradually degrades shingle granules
Creates an ideal germination bed for moss spores landing on the roof surface
The acidity of decomposing conifer needles deserves particular attention. Over time, that acidic layer in contact with asphalt shingles contributes to granule loss and shingle surface degradation in ways that accelerate aging—particularly on north-facing slopes where UV exposure doesn’t counterbalance the effect.
What Broadleaf Debris Does Differently
Maple, alder, and big-leaf maple debris behaves differently. Leaves are larger, trap more standing water per square foot, and decompose into a heavier, wetter organic paste when wet. They’re especially problematic in roof valleys, where they collect and hold water in the exact spots where water volume is highest. A clogged valley full of saturated leaf material is one of the fastest paths to water infiltration in the Pacific Northwest.
Seed pods from maples—the familiar “helicopters”—are a particular nuisance because they’re small enough to work into tight spaces: behind step flashing, under shingle edges, and into gutter downspout openings where they create blockages that are difficult to clear without professional help.
A Side-by-Side Look at PNW Tree Debris
Debris Type
Primary Risk
Decomposition Rate
Gutter Impact
Conifer needles
Acidic mat, moss substrate, granule degradation
Slow—months to years
Severe—interlocking, dense blockages
Broadleaf (maple, alder)
Valley flooding, standing water, paste buildup
Moderate—weeks to months
High—volume and wet weight
Seed pods / helicopters
Penetration into tight spaces, downspout blockage
Moderate
Very high—blockage risk
Twigs and small branches
Physical abrasion, granule scraping
Slow
Moderate
Bark and organic dust
Granule contamination, moss nutrient layer
Variable
Low direct impact
How Tree Debris Leads to Moss Growth: The Step-by-Step Chain
Moss doesn’t appear on a roof randomly. In the Pacific Northwest, tree debris almost always plays a direct role in setting the table for it. Understanding the chain explains why moss so frequently appears first under tree canopy and spreads outward from there.
Step One: Debris Accumulates on the Roof Surface
Needles, leaves, and organic material collect in low-flow areas: valleys, ridgelines, areas around chimneys, and behind any protrusion that interrupts the roof’s drainage pattern. Most homeowners don’t notice this accumulation because it builds gradually and is rarely visible from the ground.
Step Two: The Debris Mat Retains Moisture
The accumulated material holds water far longer than bare shingles would. Under tree canopy, that moisture-retention effect is compounded by reduced sunlight and airflow. The result is a consistently damp microenvironment on the roof surface—exactly what moss spores need to germinate.
Step Three: Moss Spores Land and Find Purchase
Moss spores travel through the air and are deposited on rooftops by wind, rain, and birds. On a dry, well-maintained roof, they rarely establish—there’s nothing to anchor to, and UV exposure and drying cycles work against them. On a debris-laden, shaded, damp roof, they find ideal conditions. The organic material from decomposing debris provides nutrients. The moisture provides hydration. The shade prevents the UV exposure that would otherwise inhibit growth.
Step Four: Moss Establishes and Begins Damaging Shingles
Once established, moss puts down rhizoids—root-like anchors—directly into shingle material. It forms spongy mats that hold additional moisture, lifting shingle edges as it grows beneath them. What began as a debris problem is now a biological problem with physical consequences. Industry research suggests that untreated moss growth can reduce the effective lifespan of an asphalt shingle roof by 10 or more years in high-moisture climates like Western Washington.
Step Five: Algae Follows, Then Lichen
Moss growth creates a biofilm that encourages algae colonization. Algae degrades shingle granules and adds another layer of biological material. Lichen—the most adhesive and difficult-to-remove organism—can follow after extended neglect. At this stage, the damage is compounding and increasingly expensive to address.
Can Overhanging Branches Actually Puncture or Break My Roof?
This is the question that surprises many homeowners, because the answer is more nuanced than a simple yes or no—and the most common form of branch damage isn’t the dramatic kind most people imagine.
The Abrasion Problem Is More Common Than Direct Puncture
A healthy, living branch that overhangs your roof is unlikely to punch through shingles under normal circumstances. The real and far more common threat is abrasion. Branches that contact the roof surface—especially during wind—act like slow-moving sandpaper. Every time the branch sways in a storm, it scrapes across shingles, dislodging granules, scratching surface material, and creating micro-abrasions that compromise the weatherproofing layer. Over years, a branch that “barely touches” the roof can wear a visible track of granule loss into the shingles beneath it.
When Branches Do Cause Direct Physical Damage
Direct puncture or impact damage happens in two scenarios: storm events that cause branch failure, and slow-contact damage from dead or dying branches.
Storm branch failure is the more dramatic scenario. A branch—or an entire tree—that comes down during a wind event, ice storm, or heavy snow load can cause catastrophic damage. In Western Washington, where mature conifers regularly reach 80 to 150 feet, a falling branch from high in the canopy carries substantial force. Even a branch that doesn’t penetrate the roof deck can crack ridge caps, displace flashing, and dislodge multiple shingles in a single event.
Dead branch contact is the slower, less dramatic version. A dead branch is more brittle than a living one, more likely to shed bark and material onto the roof, and more susceptible to failure under wind or ice load. A dead branch resting on or near the roof is a higher-risk situation than a healthy one because its structural integrity is compromised and its failure is less predictable.
The Safe Distance Rule
Most roofing professionals recommend maintaining a minimum clearance of six to ten feet between overhanging branches and the roof surface. Here’s why that number matters:
It eliminates direct contact abrasion from branch sway during wind events
It reduces the volume of debris deposited directly onto the roof surface
It decreases the impact radius if a branch fails unexpectedly during a storm
It improves sunlight exposure and airflow to the roof surface below the canopy
In the PNW, where trees grow quickly, maintaining that clearance is an ongoing task rather than a one-time trim. Working with a certified arborist once every few years is the most practical way to stay ahead of it.
What Overhanging Trees Do to Your Gutters
Tree coverage doesn’t just damage shingles—it’s one of the primary causes of gutter failure in Western Washington, and compromised gutters create a feedback loop that feeds moisture damage back up into the roof system.
How Tree Debris Destroys Gutter Function
Gutters filled with needle mats, leaf paste, and seed pods can’t move water. When gutters back up, water pools along the roofline, soaks into fascia boards, seeps behind siding, and creates the conditions for ice dam formation in winter. In the PNW, where rain events can dump significant volume in a short period, a clogged gutter system can back water up under the lowest course of shingles within hours of a heavy storm beginning.
The Weight Factor
Saturated needle mats and leaf debris are heavy. Gutters that are consistently overfilled with wet organic material are under constant excess load—load they weren’t designed to carry. Over time, gutter hangers pull away from fascia boards, gutters sag and separate at joints, and the entire system loses its proper slope. When gutters lose pitch, they pool water rather than draining it, accelerating corrosion at the lowest points and creating standing water conditions that attract pests and accelerate wood rot in the fascia beneath.
The Trees That Cause the Most Roof Problems in Western Washington
Not all trees are equally problematic. In the South Sound and throughout Western Washington, a few species deserve particular attention from a roofing standpoint.
Douglas Fir
The most common large conifer in Western Washington. Drops needles continuously, sheds bark in strips, and produces small cones that accumulate in gutters. The combination of needle volume, bark debris, and the sheer size of mature specimens makes Douglas firs one of the highest-impact trees for nearby rooftops—and one of the most common trees overhanging homes from Olympia to Tacoma and throughout Thurston County.
Western Red Cedar
Sheds small, scale-like foliage continuously rather than in seasonal drops. Cedar debris accumulates in gutters and on roof surfaces year-round, providing a near-constant source of organic material. Cedar foliage also contains natural oils that can leave residue on roofing surfaces over time.
Big-Leaf Maple
Produces the largest leaf debris of any common PNW deciduous tree. A mature big-leaf maple can drop an enormous volume of leaf material in fall, overwhelming gutters and forming deep debris mats in roof valleys. Its seed helicopters are a particular gutter nuisance in spring.
Alder
Fast-growing and prolific debris producers. Alder catkins—the small, cylindrical seed structures—are notorious for working into tight spaces and downspouts. They decompose into a sticky organic paste that adheres to gutter surfaces and is difficult to flush out.
What This Means for Your Homeowners Insurance
This is something many PNW homeowners don’t find out until it’s too late: most homeowners’ insurance policies distinguish between storm damage and maintenance neglect, and tree-related roof damage that results from long-term neglect may not be covered.
If moss, debris buildup, or sustained moisture infiltration has been present for an extended period, an insurance adjuster may classify the damage as a maintenance issue rather than a covered peril. That distinction can mean the difference between a covered claim and an out-of-pocket roof replacement. Documented regular maintenance—roof cleaning, gutter clearing, and professional inspections—is part of how you demonstrate responsible upkeep and protect the coverage you’ve been paying for.
How to Manage Your Trees Without Losing Them
The goal isn’t to remove every tree near your home. Most homeowners in the PNW genuinely love their trees and the character they give a property. The goal is strategic management that preserves the trees while removing the specific conditions that damage the roof.
Practical Steps That Make a Real Difference
Maintain branch clearance. Work with a certified arborist to remove branches that overhang or contact the roof surface. Six to ten feet of clearance is the target—and in the PNW, it’s a periodic maintenance task, not a one-time project.
Remove dead limbs proactively. Dead branches are higher-risk, higher-debris, and lower-value than living ones. Removing them promptly reduces both impact risk and the volume of bark and needle material depositing on the roof.
Schedule regular roof and gutter cleaning. On a heavily treed property, annual cleaning is often the minimum. Twice-yearly cleaning—fall and spring—is more appropriate for homes with significant canopy coverage. Removing debris before it has time to form a moss substrate is far more effective than treating established growth.
Inspect the roof after storm events. Wind storms can deposit significant branch material in a single night. A quick visual check after major weather events catches contact damage before it becomes a leak.
Consider zinc or copper strips at the ridge. These metal strips release trace amounts of metal compounds with each rain, creating a surface environment that’s inhospitable to moss and algae. They don’t replace cleaning, but they’re an effective supplemental measure for heavily shaded roofs.
What to Watch For on Your Own Roof
You don’t need to climb a ladder to monitor your roof’s condition. A few things are visible from the ground or from an upper-story window that tell you whether tree-related damage has already begun.
Green patches on north-facing slopes—moss is establishing, likely fed by debris accumulation
Dark streaks running down shingles—algae growth, often following the path of debris runoff
Bare or dark patches on shingles—granule loss from abrasion or acidic debris contact
Staining on fascia or soffit—water is backing up behind gutters or infiltrating at the eaves
Visible branch contact marks—worn tracks in shingle surfaces where branches have been rubbing
Any one of these is worth a closer look. More than one in the same area suggests an active problem that’s worth having assessed by someone who can get eyes on it safely.
Keeping Your PNW Roof Healthy Under Tree Coverage
Living with beautiful trees in the Pacific Northwest is one of the genuine pleasures of this region. But protecting your home means staying ahead of the slow, quiet work that tree coverage does on your roof when nobody’s paying attention.
The homeowners who get the most years out of their roofs here are the ones who treat roof and tree maintenance as connected systems. They trim before debris problems develop. They clean gutters before the wet season. They catch moss early, when treatment is inexpensive and fast. They don’t wait until a sagging gutter or a ceiling stain forces the conversation.
Your roof can coexist with your trees. It just needs a little more attention because of them—and you’ve already taken the most important step by knowing what to look for.
About The Roof Doctor
The Roof Doctor is a family-owned and operated roofing company with more than 60 years of experience serving Pacific Northwest homeowners in Olympia, Tumwater, Tacoma, and throughout the South Sound. Licensed, bonded, and insured, their team is available 24/7 and completes most jobs in just one to two days. Whether you’re dealing with moss from years of tree shade, debris-clogged gutters, branch damage from a recent storm, or something you can’t quite identify from the ground, they’ll give you an honest assessment and get it handled right. Call us anytime—we’re available 24/7 and happy to help.